Magic Eraser - AI Photo Editor
- 4.8
- Rating
- 10.00M
- Installs
- Free
- Price

 Analysis by App-foxy
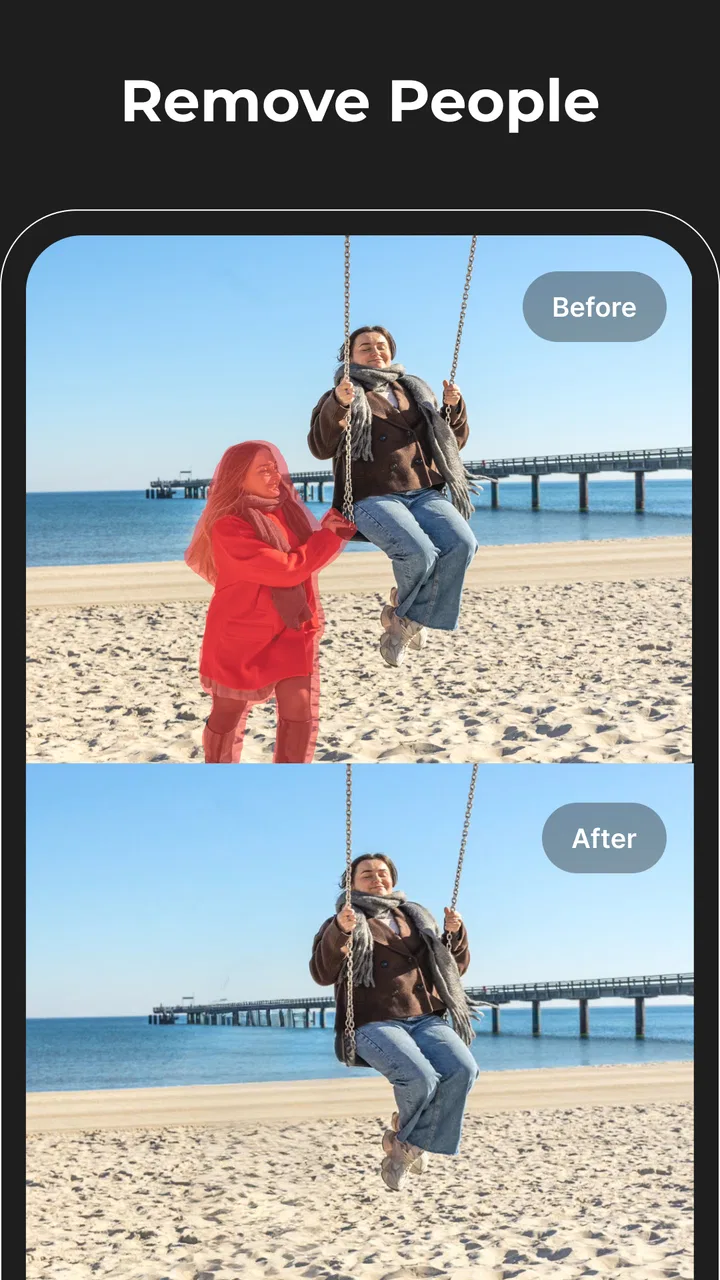
Removing an unwanted object from a photo sounds simple until the result comes back with a strange blur, a repeated pattern, or a background that no longer lines up. I spent time with Magic Eraser - Remove Objects to see how well it handles that everyday problem, and my overall impression is that it is most useful when you treat it as a careful editing tool rather than a one-tap miracle. It belongs to the Photography category, is free to install, and comes from Creatix Technology Global Limited.
The app focuses on cleaning up images by removing unwanted objects, text, logos, watermarks, and parts of a background. That makes it appealing for quick social posts, product photos, travel pictures, and personal snapshots where a small distraction is ruining an otherwise good image. It is available for Everyone and supports devices running Android 6.0 or later. Its current version is 3.2.16, while optional in-app purchases range from $1.99 to $99.99 per item.
What matters most in practice is not simply whether an object disappears. The real question is whether the replacement looks believable at the size where you plan to share the picture. A tiny mark in the corner is an easy job. A person crossing a detailed fence, a sign covering a face, or a large object blocking a textured wall requires more patience and a realistic expectation of what automatic editing can achieve.
You May Also Like

 Google Keep - Notes and lists
Google Keep’s Quiet Growth Shows the Appeal of Simpler Notes
As mobile work gets busier, Google Keep keeps winning a simple contest: capture a thought quickly, find it later, and get on with the day.

 Blood Strike: 2.5 Anniversary
Blood Strike’s Loadouts Turn Every Drop Into a Tactical Gamble
A close look at Blood Strike’s custom loadouts: how fast access to signature weapons reshapes its battle royale rhythm, rewards preparation, and narrows the gap between fights.

 Pandora - Music & Podcasts
Pandora’s Music Is Easy to Start, but Harder to Recover
Pandora’s strength is its low-effort path from a seed to a station. Its weak spot is how much confidence it asks you to place in connection, setup, and quiet recovery.

 8 Ball Pool
 Is Built on Rivalries, Rematches, and Routine
A close look at the rivalries, rematches, shared routines, and unanswered safety questions that turn a quick pool match into a persistent mobile community.

 Samsung Music
’s Quiet Strength Is Playing What You Already Own
Its reach comes less from spectacle than from dependable access to a personal library. That simplicity is both the app’s strongest retention engine and its ceiling.

 AccuWeather: Weather Radar
AccuWeather Review: A Quick, Clear Forecast for Everyday Decisions
For everyday plans, the best forecast is the one you can understand quickly. AccuWeather makes rain timing, radar, and local conditions easy to act on, with a few trade-offs.
More From Our News Desk



Where the editing process usually gets stuck
Before moving on to setup, I’d first identify the kind of image and edit that tends to cause trouble: a complicated background, a broad selection, or a repair that looks fine only when zoomed out. Knowing where the process catches can help me choose a more forgiving photo and decide whether removal is worth attempting at all.
Choosing the right image before editing
The first point where I would slow down is image selection. A photo may look sharp in the gallery but contain too little background information for a convincing removal. If the unwanted item covers a large part of the scene, the app has to guess what belongs there. It can often borrow nearby colors and patterns, but it cannot truly recover details that were never visible in the original picture.
I found that simple backgrounds are much more forgiving. A plain wall, open sky, pavement, or soft out-of-focus area gives the eraser room to blend. Repeating details create more risk. Brickwork, railings, window frames, printed fabric, and straight architectural lines can reveal the edit quickly if the replacement does not continue the original pattern correctly.
That distinction helps explain why two users can have very different experiences. Someone removing a small rubbish bin from an open street scene may get a clean result immediately. Someone trying to erase a person standing in front of a bicycle may need several passes, smaller selections, and a willingness to accept a less-than-perfect repair.
Making a selection that is neither too broad nor too narrow
The selection itself is more important than many first-time users expect. If I brush far outside the object, the app has to rebuild more of the surrounding area than necessary. That can soften nearby edges or alter details that were already correct. If I select only the center and leave a thin outline behind, the unwanted item may remain visible as a halo.
My practical approach is to include the full object and a very small margin around it, then inspect the result at normal viewing size. For a person, I include stray hair, clothing edges, and shadows that clearly belong to them. For lettering or a watermark, I cover the complete mark rather than erasing individual characters one at a time. This usually produces a more coherent repair than attacking tiny pieces separately.
On a busy image, I prefer several controlled edits over one huge swipe. Removing a sign, for example, may work better if I handle the lettering first and then address the sign itself. The trade-off is time: smaller edits demand more attention, but they also make it easier to identify which part caused an unnatural patch.
Why a technically successful removal can still look wrong
There is a difference between deletion and reconstruction. The app can remove the selected visual information, but the replacement still has to fit the scene. A smooth patch may look fine on a phone screen and become obvious when the photo is cropped tightly. Conversely, a repair that seems slightly soft may be perfectly acceptable in a small profile image.
I recommend checking the finished image at three levels: the full composition, the area around the edit, and the final size you intend to use. Looking only at a zoomed-in preview can make a harmless blend seem terrible, while looking only at the full image can hide a repeated texture or faint outline.
Setup checks that prevent avoidable frustration
A few small decisions before editing can prevent much of that friction. I’d check that I have the original, settle on the crop I want, and choose the sharpest version of the picture so I’m not asking the repair to compensate for avoidable image problems. The next section looks at how those preparations make the workflow steadier.
Start with a clean original
Before opening the editor, I make a copy of the original photo or keep it safely in the gallery. This is especially useful when experimenting with large objects or complicated backgrounds. A failed attempt is much less stressful when I can return to the untouched image instead of trying to undo a chain of edits.
I also avoid beginning with a heavily compressed screenshot if the original image is available. Screenshots can contain extra interface elements, reduced detail, or text that becomes harder to blend. The application can still be useful with them, but the quality ceiling is lower from the start.
Check the image orientation and crop first
A quick crop can make the removal easier. If the unwanted object sits near the edge, trimming a little of that edge may be more natural than rebuilding it. This is one of the most useful decisions to make before reaching for the eraser: sometimes the best edit is composition, not reconstruction.
I also check whether the image is rotated correctly and whether the subject is already framed the way I want. Editing first and cropping later can leave a repaired area in a place that becomes awkward once the composition changes. When the object is close to a border, I decide the final crop before doing detailed cleanup.
Keep expectations realistic with text and watermarks
Removing text is one of the app’s more practical uses, but the background behind the lettering determines the result. Text over a plain surface is usually easier than text over a photograph, patterned paper, or a face. If the writing covers important facial features or fine product details, the app may produce a visually smooth area that is still inaccurate.
I would also be careful with ownership and context. The tool is convenient for cleaning up my own photos, removing a date stamp from a personal image, or preparing a picture for a private project. It should not be treated as permission to strip credit or ownership marks from somebody else’s work. The editing capability and the right to use the edited image are separate questions.
Understand the free starting point and optional purchases
The app is free, which makes it easy to try on a real photo before deciding whether it fits your routine. There are also optional purchases, with listed prices from $1.99 to $99.99 per item. I would not pay immediately based on the promise of a single perfect result. First, test the kinds of images you actually edit: portraits, scenery, product shots, screenshots, or social media pictures.
This matters because an editor can be excellent for small corrections but disappointing for large, complex removals. A paid option may be worthwhile for frequent use, but occasional users should judge it by whether it saves enough time compared with their existing gallery editor or another dedicated retouching tool.
Device compatibility is an easy check
Android compatibility begins with version 6.0, so the app is not limited to only recent phones. Still, compatibility on paper does not guarantee the same editing comfort on every device. Screen size, touch accuracy, available storage, and general device performance all affect how pleasant it is to mark an object precisely.
On a smaller screen, I find it easier to edit in stages and inspect the result often rather than drawing one long, complicated selection. If the brush feels hard to control, the problem may be the display or the way the image is being viewed rather than the removal engine itself.
Recovering when a workflow goes wrong
Even a careful setup cannot guarantee a clean first pass, so I treat a poor result as a cue to change the approach rather than repeat the same gesture. I’d isolate the troublesome edge or background area, then compare the revised repair with the untouched image. That makes it easier to recover without letting one experiment dictate the whole picture.
When the first removal leaves a smear
A smeared patch usually tells me that the selected area was too large, the surrounding background was too complicated, or the object crossed several different surfaces. I do not keep repeating the same broad stroke. Instead, I return to the original image, reduce the selection, and separate the object into logical areas.
For example, a person standing beside a wall and a plant should not necessarily be treated as one uninterrupted shape. The wall requires one kind of reconstruction, while the leaves need another. Working around the boundary carefully can prevent the app from blending plant texture across the wall or flattening the edge of the subject.
When a faint outline remains
A leftover outline is often caused by missing the object’s edge, especially around hair, shadows, semi-transparent material, or pale lettering. I use a second small correction rather than enlarging the original selection dramatically. The aim is to remove the visible fringe while preserving the nearby background.
Shadows deserve special attention. Sometimes the object is gone but its shadow still makes the scene look wrong. In other cases, removing the shadow makes the subject appear to float or creates a bright patch. I decide whether the shadow belongs to the unwanted item before editing it; it is not automatically something that should disappear.
When the background pattern breaks
Repeated patterns are where I become most critical. A wall with horizontal lines, a tiled floor, or a fence can expose a repair through misaligned edges. If one pass creates a visible repetition, I try a smaller selection that follows the direction of the pattern. I also avoid making the repaired section larger than the missing area.
There are times when the most convincing solution is to change the crop or use the image at a smaller size. That may sound less impressive than a flawless reconstruction, but it is often the honest professional choice. A subtle edit that survives normal viewing is more valuable than a technically ambitious repair that draws attention to itself.
When the saved result does not match the preview
If the final image looks different from the editing view, I first compare it at the same zoom and display size. Preview scaling can make edges appear softer or sharper than they will in the saved file. I also check whether I am viewing a resized copy rather than the original working image.
Keeping the workflow simple helps: open the original, make one controlled edit, inspect it, and save a separate result. If I stack many changes without checking, it becomes difficult to know whether the problem came from the selection, the image itself, or a later crop. A staged process is slower by a few moments but much easier to troubleshoot.
When the app is not the cause
A visible flaw can come from the source image or the way it will be viewed, rather than from the editing tool alone. I’d consider blur, compression, pattern complexity, and the final crop before deciding the app has failed. The following section helps separate those limits from cases where a different editor or workflow is the better choice.
Source quality can limit every editor
Blur, low light, motion, and aggressive compression can make object removal look poor even when the tool is functioning normally. A moving person may already have soft edges, while a night photo may contain noise that the repair area cannot convincingly reproduce. In those situations, the app is working with weak visual clues.
I get better outcomes by choosing the sharpest available version and avoiding unnecessary edits before removal. Brightening, sharpening, and resizing can exaggerate defects around the object. If enhancement is needed, I prefer to remove the distraction first and make broader adjustments afterward.
Some jobs need a different kind of editor
This app is a good fit for quick object cleanup, but it is not the best answer for every photography task. If I need layers, masks, precise clone-stamp control, color correction, or a detailed composite, a full photo editor is more suitable. Those tools take longer to learn, but they give me direct control when automatic reconstruction is not enough.
For a simple crop, rotation, brightness adjustment, or basic filter, the phone’s built-in gallery may be faster. Installing a specialized remover makes sense when unwanted objects are a recurring problem, not when I only need a one-time crop. The advantage here is focus; the limitation is that focused tools may not replace a complete editing workspace.
Privacy and sharing habits still matter
When editing personal images, I pay attention to where the finished copy goes and avoid using sensitive photos casually. A picture of a home interior, identification document, child, or private conversation deserves more care than a disposable travel snapshot. I also keep the original separate so that the edited version does not become the only copy.
That is not a criticism unique to this application. It is simply part of using any image editor responsibly. The most useful habit is to decide what the image is for before editing it: private storage, a message, a social post, or a public project. The acceptable level of imperfection and the care needed with the original change depending on that purpose.
My practical verdict after using it
Magic Eraser - Remove Objects is a straightforward choice for people who regularly notice small distractions in otherwise good photos. I like it most for removing signs, stray items, small marks, and unwanted background details when the surrounding scene is reasonably simple. Its free entry point makes experimenting easy, and its Everyone age rating keeps the app approachable for general household use.
The strongest practical lesson is that selection quality matters more than speed. A careful outline, a suitable source image, and a final inspection at normal viewing size can turn an ordinary result into a convincing one. The app rewards users who edit in small sections rather than expecting one broad swipe to solve a complicated scene.
Its limitations are equally clear. Large objects, patterned backgrounds, overlapping subjects, and important details may require repeated attempts or a more advanced editor. Optional purchases also mean that frequent users should test the free experience against their own workload before committing money. The high public response, with a 4.8 average from around 533 thousand ratings and more than 10 million installs, shows that many people find the concept useful, but popularity does not remove the need to judge results photo by photo.
I would recommend it to casual photographers, social media users, travelers, and anyone who wants a focused cleanup tool without learning a full desktop-style editor. I would skip it as a primary tool if my work depends on exact restoration, professional retouching, or complex layer-based editing. For the everyday scenario I care about most—removing a distracting passerby, logo, or small object before sharing a photo—it is convenient and worth trying, provided I am willing to inspect the repair instead of accepting the first result blindly.
In short, this is a useful practical eraser, not a replacement for photographic judgment. Choose a strong original, mark only what needs changing, recover from poor results with smaller selections, and compare the finished picture at its real sharing size. Used that way, Magic Eraser - Remove Objects can save time and make ordinary photos noticeably cleaner without turning a simple edit into a full production.
FAQs for Magic Eraser - AI Photo Editor
01What is Magic Eraser - Remove Objects and how does it work?
Magic Eraser - Remove Objects is an app designed to help users remove unwanted objects from their photos with ease. Utilizing advanced AI technology, the app quickly identifies and erases selected areas of an image, seamlessly blending the background to maintain a natural look. Ideal for enhancing photos by eliminating distractions, the app is user-friendly and efficient.
02Is Magic Eraser - Remove Objects suitable for all types of photos?
While Magic Eraser - Remove Objects is highly versatile, it works best on photos with relatively simple backgrounds. Complex patterns or busy backgrounds might require additional adjustments to achieve a seamless look. The app is perfect for portraits, landscapes, and everyday shots where minor edits can make a significant difference.
03How user-friendly is the Magic Eraser - Remove Objects app?
Magic Eraser - Remove Objects is designed with a simple and intuitive interface, making it accessible to users of all skill levels. With easy-to-follow tutorials and straightforward tools, even beginners can achieve professional-looking results without a steep learning curve. The app's interface is clean and responsive, ensuring a smooth editing experience.
04Are there any limitations or drawbacks to using Magic Eraser - Remove Objects?
While the app offers powerful tools, it may not perfectly erase objects in highly complex images without some manual tweaks. Additionally, free versions may come with watermarks or limited features, encouraging users to opt for a premium subscription for full functionality. Users should also ensure their device meets the app's technical requirements for optimal performance.
05What are the device requirements for installing Magic Eraser - Remove Objects?
Magic Eraser - Remove Objects generally requires a device running Android 6.0 or iOS 11.0 and above. Adequate storage space and a decent processor will enhance its performance, especially when dealing with high-resolution images. Always check the app's specific store listing for the most up-to-date compatibility details to ensure a smooth installation and usage experience.
Pros
- Intuitive interface simplifies object removal.
- High-quality results with minimal effort.
- Supports multiple photo formats.
- Quick processing with minimal lag.
- Free version offers essential features.
Cons
- Some advanced tools require a purchase.
- Occasional errors with complex backgrounds.
- Limited tutorial resources available.
- Ads can be intrusive in the free version.
- Requires internet for some functionalities.

Magic Eraser - AI Photo Editor
Gallery